
When people compare silicone molds for candle, soap, resin and gypsum, the shape is usually the first thing they notice. In practice, the casting material often changes the decision more than the design does. A tall candle can need wall support, a loaf soap mold has to fit the cutting workflow, a rigid resin casting can lock behind a narrow neck, and a heavy gypsum or Jesmonite piece can distort a flexible mold before it ever reaches the demolding stage. The BKSilicone Silicone Molds catalog is a useful place to compare available forms, but the final choice should be made around the complete casting process. Explore silicone molds for candle, soap, resin, plaster and concrete casting for finished-mold options.
Start with the Casting Material, Not Just the Shape
Two molds with a similar silhouette can behave very differently once they are filled. Wax cools and contracts, soap changes as it cures, resin can trap air or adhere differently, and mineral mixes add much more weight. That is why a useful comparison starts with heat, flow, cure behavior, finished rigidity, filled weight, and release direction.
Broad labels such as “resin,” “wax,” or “plaster” are only a starting point. Formulations vary, as do fillers, pigments, fragrance systems, cure schedules, and release agents. For a production project, the exact product name and any available TDS or SDS are more useful than the material family alone.
Finished weight is easy to overlook when the mold is empty. Once a deep cavity holds a dense mix, flexible sidewalls can spread and the base can bow. In that situation, a fitted tray, shell, or rigid frame may improve the result more than choosing a more intricate surface pattern.
Material hardness changes the release problem too. Wax and soap may tolerate some flex while the mold rolls away. A cured resin, plaster, or gypsum part stays rigid, so the same undercut can turn from a manageable feature into a geometric lock.
A Quick Way to Narrow the Catalog
Choosing Molds for Candle Making
Candle projects combine heat, cooling shrinkage, fragrance systems, colorants, wick placement, and repeated demolding. The mold needs to work with that process, not just produce an attractive silhouette. The BKSilicone silicone candle molds category includes pillars, tapers, flowers, figures, geometric pieces, and other decorative forms that can be shortlisted by shape before the wax-specific checks begin.
There is no useful universal pour-temperature claim for every wax and additive system. A better approach is to work from the intended formulation and its documentation, then use a controlled sample to see whether the cavity stays stable during filling and cooling.
Tall pillars: support and release come before surface detail
A tall pillar can look straightforward when the mold is empty but become less stable once filled. Sidewalls may lean or widen, and an unsupported base can lose level. A fitted holder, outer support, or level tray can keep the geometry under control without changing the decorative design.
Deep cavities also create a longer release path. The opening needs enough room for the silicone to roll back gradually rather than forcing all the strain through a thin rim or one decorative corner.
Wick access and fine decorative detail
Wick access should follow the intended centerline without passing through a fragile feature. At the same time, petals, folds, facial features, and other narrow details need enough flow access to fill without leaving air pockets. Slow filling or changing the mold orientation can help, but the sample piece will show whether those details are practical for repeated production.
Repeated release is where weak areas show up. Openings, thin rims, corners, and undercuts see the most bending, so the operator should be able to peel the mold away across a wider area instead of pulling hard from one point.
Choosing Molds for Soap
Soap selection starts with the process format. Cold-process, hot-process, melt-and-pour, and other methods differ in flow, heat development, cure behavior, and what happens after the pour. The BKSilicone silicone soap molds category covers loaf, slab, column, multi-cavity, and decorative options, but the right format depends on how the batch will be handled and finished.
Choose the mold around what happens after the pour
A loaf mold creates one larger block that is cut later, so the mold cross-section should already make sense for the target bar thickness, cutter, and packaging. A poor match here creates trimming waste or inconsistent bars even if the soap itself cures perfectly.
A multi-cavity tray removes the cutting stage, but it introduces another question: can every cavity receive a similar fill while the full tray stays level and easy to move? For repeated batches, bench space, cleaning access, and cavity spacing matter as much as the number of bars per pour.
Cold-process, hot-process, and batch consistency
Cold-process soap can generate substantial heat while the reaction develops, so recipe, batch size, insulation, and workspace conditions all affect the outcome. The mold is part of that system rather than the only control.
Hot-process soap often reaches the cavity with a thicker texture. Narrow corners and very fine detail can become harder to fill consistently, making a wider opening or simpler geometry more practical. Across either process, stable walls, visible fill boundaries, and accessible edges make repeatable production easier to achieve.
Choosing Molds for Resin
Resin needs a more cautious compatibility check because “resin” covers very different chemistries. Epoxy, polyurethane, UV-curing, acrylic, and filled systems can differ in cure behavior, adhesion, heat, surface response, and release. A mold that works for wax or soap should not automatically be treated as suitable for every resin.
For a production project, the useful inputs are the exact resin, additives, mix ratio, cure system, release method, TDS, SDS, and any previous test history. When that evidence is limited, keep the first sample small and judge the complete cure, surface quality, and release before scaling.
Start with chemistry, then look at air and surface finish
Resin can carry air from mixing into deep recesses, narrow channels, and fine texture. The cavity needs a practical fill path that lets air rise or escape instead of collecting at a low point. Surface finish matters too: a polished cavity can support a glossier appearance, while a matte texture gives a softer result, but pigments, fillers, and release agents can alter what the final surface looks like.
Compatibility cannot be approved from a broad label alone. If the exact formulation changes, the interaction with the mold can change as well.
Rigid parts, narrow necks, and geometric locking
Once resin cures, it normally stays rigid during demolding. That makes deep reverse angles, internal hooks, narrow necks, and enclosed details more important than they may appear in the CAD model or master. Flexible silicone may stretch around the geometry, but the finished part still has to pass back through the opening.
If a wide body sits below a much narrower neck, a one-piece form can become a poor production choice even when the first pour looks perfect. A split mold or planned parting line can open around the part and reduce release strain. Seam position, alignment features, and external support then become part of the design decision.
Choosing Molds for Gypsum and Plaster
Gypsum and plaster mixes can reproduce detail well, yet the finished casting may still be rigid and brittle. That creates a different problem from wax or flexible soap: a clean fill does not guarantee a clean release. Opening width, edge protection, release direction, and support deserve attention before choosing a deep or heavily undercut shape.
A clean fill can still become a difficult release
Mix consistency affects both detail capture and trapped air. A thinner mix can reach fine texture more easily, although excess water may change the finished result. A thicker mix can leave voids in corners or recessed patterns.
The release stage is where thin projections, sharp corners, and narrow decorative edges become vulnerable. A fresh casting may also have limited strength. If the part has to twist around an undercut or squeeze through a narrow opening, chipping can occur even when the cavity filled correctly. A wider opening or split structure is often easier to handle than relying on extra flex in the silicone.
Support large or brittle castings before they become heavy
Large gypsum or plaster casts add weight quickly. The mold base can bow and the sidewalls can spread, which changes the geometry before the material has set. A fitted support shell, rigid frame, or level tray can hold the mold in shape during filling and movement.
That same support plan should make demolding easier. Heavy rigid parts need stable hand positions while the silicone rolls away from the surface. If the operator has to lift the part by a thin decorative edge, the mold geometry is creating a handling problem rather than solving one.
Concrete and Jesmonite Considerations
Concrete and Jesmonite-type mixes increase the load on flexible molds even further. Filled weight, mineral content, abrasion, support, and safe movement move to the front of the decision. The BKSilicone concrete, plaster & Jesmonite molds category is a more relevant starting point for these heavier applications than simply choosing by decorative theme.
Build the support plan before the pour
A large mold is easier to handle when it is already sitting on the board, tray, or frame that will carry it while filled. Trying to move a flexible mold after adding a dense mix can distort the base or sidewalls. Support should follow the overall shape instead of pressing hard on one local area, which can create a new distortion.
Handling and abrasion matter at scale
Mineral-filled mixes can be more abrasive than wax or soap, so sharp aggregate, scraping, and rough cleaning can affect the cavity surface over time. Tool and cleaning choices should minimize unnecessary contact damage.
Heavy castings also need a realistic lifting and release plan. Filled weight, workspace, support access, and hand position belong in the same conversation. A visually attractive mold is not a practical production choice if the full unit cannot be moved or released safely.
Compare Shape, Depth, Undercuts and Cavity Layout
Once the material is clear, geometry becomes easier to judge. Shape controls where air can collect, how much pressure reaches the walls, and whether the finished part has a clean path out of the cavity. Depth, opening width, undercuts, cavity count, and parting structure usually affect production more than decorative style alone.
Single-cavity or multi-cavity?
A single cavity is easier to position, support, and monitor. A multi-cavity tray can organize a larger batch and reduce separate pours, but the whole tray has to stay level and every cavity still needs a consistent fill.
More cavities also mean more filled weight, more bench space, and a larger unit to clean and demold. The best cavity count is the one that improves output without making the tray awkward to carry or release.
Shallow and deep cavities create different problems
Shallow cavities usually give easier access and a shorter release path. Deep molds create more wall pressure and more surface contact. That is where opening width, wall stability, air movement, and external support become more important.
A long narrow cavity may fill successfully but trap air at the bottom or become difficult to release. The trial needs to test both stages. “It filled” and “it can be produced repeatedly” are not the same result.
Undercuts and narrow necks can hide the real release risk
An undercut places part of the casting behind the main release direction. In practical terms, a wider section has to pass through a narrower opening. Silicone can flex, but a rigid or brittle casting cannot shrink to escape the geometry.
A bulbous body below a narrow neck is a common example. If the difference is small, gradual rollback may be enough. If the lock is substantial, a split mold or planned parting line usually gives a safer and more repeatable release.
One-piece, split, and multi-part structures
One-piece molds reduce seams and simplify setup. Split or multi-part structures are more useful when the casting needs the mold to open around it rather than stretch over it.
Parting lines should avoid critical display surfaces when possible. Alignment keys or a fitted support can help the sections return to the same position. The right structure balances seam visibility, fill access, release safety, repeatability, and cleaning.
Six red flags before ordering
Ready-Made Catalog vs Custom Development
A ready-made mold is usually the faster route when an existing shape, dimension, cavity layout, and release structure already fit the project. It is also useful when a new range needs sample testing before a larger commitment.
Custom development becomes worthwhile when the process needs something the catalog cannot provide: an exclusive shape, controlled dimensions, a specific logo, a defined cavity count, a planned seam position, or a release structure designed around the finished part. The point of custom work is not simply to make the mold more complex; it is to solve a production requirement that an existing form cannot meet.
Two Ready-Made Examples to Compare
These two catalog products show why geometry matters. They are examples rather than universal compatibility claims, so the exact casting material still needs its own documentation and sample validation.
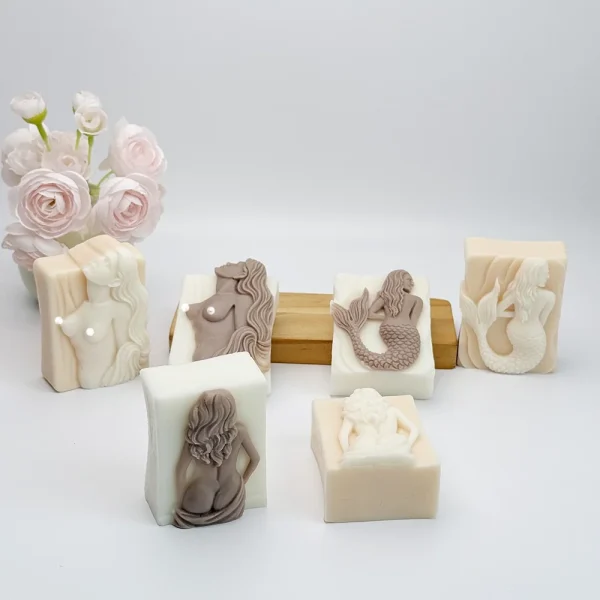
Mermaid Relief Mold 1493
This compact relief format keeps the opening broad while carrying fine decorative detail. For wax, soap, or resin projects, the useful comparison is how easily the material reaches the recessed detail and how the finished part releases from that surface.
Best fit: decorative ranges that can use an existing relief shape after material validation.
View Product Details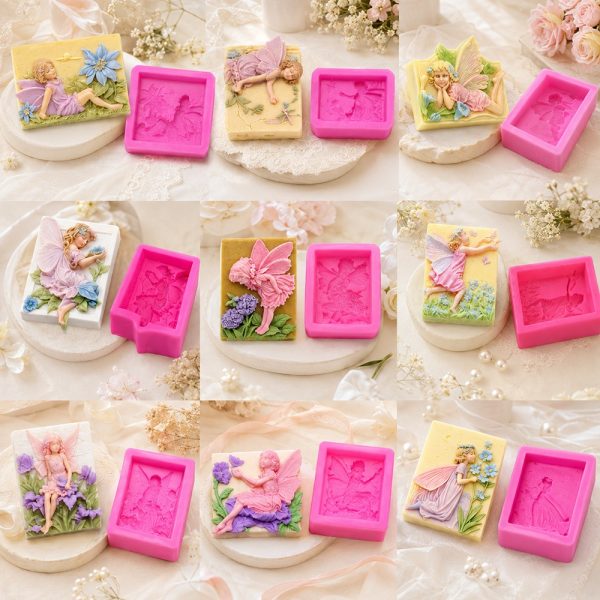
Sleeping Fairy Relief Mold AA0012
This plaque format makes it easier to compare the same decorative concept across wax, soap, resin, plaster, gypsum, cement, and Jesmonite-type casting. With heavier or more brittle materials, support and edge protection become more important than they are for a small wax piece.
Best fit: decorative plaques that need clear detail and a broad release opening.
View Product DetailsCustom Project or Ready-Made Mold?
The easiest way to decide is to ask whether the existing geometry already works with the material and production method.
Choose a ready-made mold when
- Available shapes already fit the product concept.
- Exact dimensions or exclusivity are not essential.
- The project needs practical sample testing first.
- Existing cavity layouts suit the planned batch size.
- The release structure works with the intended material.
Choose custom development when
- An exclusive shape or branded detail is required.
- Finished dimensions must follow a defined specification.
- Cavity count has to match a production workflow.
- A split line or special release path is necessary.
- Available forms cannot support the intended process.
For a custom request, connect the drawing to the real process. A recessed logo may trap air, raised lettering can create thin fragile sections, and a seamless visual concept may conflict with the parting line needed for safe release. Material behavior, filling, curing, demolding, cleaning, and packing should all be considered before the mold structure is finalized.
What to Prepare Before You Order
A useful project brief does more than show the shape. Photos and overall dimensions explain what the part should look like, but they do not show how the material flows, how heavy the filled mold becomes, or how the casting will leave the cavity. The information below helps turn a visual idea into a mold that can actually be used in production.
Finished part
- Length, width, height, diameter, and approximate weight
- Visible surfaces and acceptable seam locations
- Logo, lettering, texture, holes, or fragile projections
- Base flatness and packaging size limits
- Single-cavity, multi-cavity, loaf, slab, or split preference
Casting material
- Exact material name and available TDS or SDS
- Mix ratio, pigments, fillers, fragrance, or additives
- Normal flow condition and filling method
- Cooling, curing, setting, or drying process
- Release agent, vibration, vacuum, pressure, or heating steps
Production and demolding
- Target quantity per batch or production period
- Number of molds expected in rotation
- Manual or assisted filling method
- Planned demolding time and release direction
- Acceptable trimming, sanding, or seam cleanup
Workspace and logistics
- Workbench size and level condition
- Support trays, frames, shells, or transport boards
- Filled weight that can be moved safely
- Cleaning, storage, curing, or drying space
- Packaging, labeling, carton, and shipping requirements
One detail is especially useful: describe how you expect the part to come out. Does the wall roll back, does the casting lift vertically, or does the mold separate at a seam? That simple description often reveals a narrow opening, hidden lock, or fragile area before tooling or a larger order is committed.
Where to Start in the Catalog
If the material and release path are already clear, the application category can narrow the search quickly. Use these as starting points rather than as automatic compatibility approvals.
Candle projects
Pillars, decorative candles, and deep forms: compare wick access, cavity depth, wall support, and repeated release.
View Candle MoldsSoap projects
Loaf, slab, column, and multi-cavity formats: match the mold to recipe flow, cutting, batch handling, and packaging.
View Soap MoldsConcrete, plaster, and Jesmonite
Start with filled weight, external support, movement, abrasion, and safe release of a rigid casting.
View Mineral Casting MoldsResin projects
Identify the exact resin and cure system first, then compare surface finish, air paths, undercuts, and release geometry.
Validate the exact resin firstFrequently Asked Questions
Can one silicone mold be used for candle, soap, resin and gypsum?
Sometimes, but successful use with one material does not automatically prove compatibility with another. Temperature, cure chemistry, residue, cleaning, adhesion, finished rigidity, and release geometry can all change the result.
For cross-use, compare the exact material documentation and cleaning method, then run separate sample casts. Stop if you see sticking, swelling, surface change, incomplete cure, or a release problem that was not present with the previous material.
How should resin compatibility be checked?
Use the exact resin product, mix ratio, cure schedule, additives, release agent, TDS, SDS, and any previous test history. Labels such as epoxy or polyurethane are too broad to serve as final compatibility approval.
A controlled sample should then be checked for complete cure, sticking, residue, swelling, surface finish, and clean release before production is expanded.
Why do gypsum, plaster, concrete, or Jesmonite molds often need more support?
These mixes can create much more filled weight and outward pressure than a small wax or soap casting. Unsupported silicone can bow, spread, or move during filling, vibration, or transport. A fitted tray, rigid frame, or removable support shell can help the mold hold its intended geometry.
The finished part may also be rigid or brittle, so the support and handling plan should protect thin edges, corners, and decorative projections during release.
When is a custom mold a better choice than a catalog mold?
Custom development makes sense when an existing mold cannot meet the required shape, logo, controlled dimensions, cavity layout, seam position, or release method. It is most useful when there is a defined production reason for changing the structure.
Prepare the material, finished size, target output, difficult details, support plan, and expected demolding direction. That gives the mold design a production requirement to solve rather than only a visual reference to copy.
Shortlist the Shape, Then Check the Process
Start with the material, finished size, filled weight, opening, support, and release direction. If an existing catalog mold fits those conditions, test the shortlisted shape with the real formulation. If it does not, prepare a custom brief with the material, dimensions, target quantity, reference files, workspace, support plan, and expected demolding method.